© health.qld.gov.au
Elimination of cross-infection is a major responsibility for all health care workers. In dentistry it is achieved by employing disposable items and ensuring that all non-disposable instruments are properly cleaned before being sterilized, preferably by autoclaving. The CDC Guidelines for Infection Control in Dental Health Care Settings—2003 are the standard of care for infection control in dentistry.
Why do we decontaminate items?
Decontamination is carried out for two reasons:
- To make a reusable item safe for others to handle
- To minimize (disinfect) or eliminate (sterilize) the risk of cross-infection by direct contact within the dental office
Definitions used in the article
- Cleaning – physical removal but not necessary killing of microbes.
- Sterilization – any process, physical or chemical, that will destroy all forms of life (including bacteria, fungi, spores and viruses.
- Disinfection – using an agent that destroys germs or other harmful microbes or inactivates them, usually referred to chemicals that kill the growing (vegetative) forms but not the resistant spores of bacteria
Methods of dental instrument sterilization
There are generally two sterilization methods – physical (for example heat) and chemical.
Dental instruments that require heat sterilization (autoclave) procedure
- All stainless steel, tungsten carbide, and Teflon-coated dental hand instruments
- All burs and bur changers
- All endodontic and orthodontic instruments
- Air-water syringe tips
- High-volume evacuator tips
- Dental surgical instruments
- Ultrasonic periodontal scalers and tips
- Electro-surgery tips
- Metal impression trays
- Intra-oral radiographic equipment that can withstand heat sterilization
Dental instruments that require chemical sterilization procedure
- Metal or plastic spatulas
- Glass dappen dishes
- Plastic or glass items not meant to be disposed of that cannot withstand heat
- Mirrors for intra-oral photography
- Cheek retractors
- Handles for brush tips
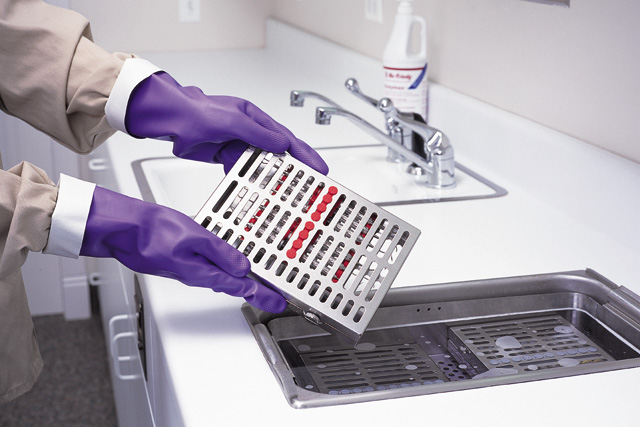
Pre-sterilization cleaning of dental instruments

Ultrasonic bath © thewatchforum.co.uk
How effective sterilization process can be depends upon direct contact between the steam and all surfaces of the dirty instruments load, as residual human tissues, oil or other deposits will prevent contact between the steam and the surfaces of the load. Contaminants which are not removed can become fixed to the instruments during sterilization making subsequent removal more difficult. Therefore all items that intended for sterilization must be clean and dry before placing them in the sterilizer chamber.
Automated versus manual cleaning
Instruments can be cleaned manually by hand or by machine using an ultrasonic bath and/or a thermal washer disinfector. Only those items incompatible with automated washing should be restricted to manual cleaning of instruments. Staff safety is enhanced as instruments do not need to be scrubbed, therefore there will be less exposure to pathogenic microbes, sharps injuries or noxious chemicals. Overall productive is increased as more time becomes available for clinical activities.
Preventing corrosion of instruments
Ideally, instruments should be cleaned as soon as possible after use. Proteins in blood and saliva left on the instrument after treatment can be absorbed and then fixed onto the surface of the instrument. Eventually blood and saliva will corrode stainless steel instruments, leading to pitting and rusting of the surface. Damaged and pitted instruments are more difficult to clean effectively and corrosion may reduce the lifespan of the instrument.
Manual cleaning of instruments
© freedentalce.blogspot.com
- Before cleaning the instruments, the staff in-charge should put on the following protective clothing:
- Disposable apron/gown
- Face shield or face mask
- Household gloves
- When moving from working in a designated dirty area to a clean area, change gloves and plastic apron and clean hands
- Dedicated separate washing and rinsing deep sinks located in a designated dirty zone.
- Use a non-foaming, neutral (pH5-9) detergent in a measured dose in a measured volume of water. Do not use washing-up liquid, which leaves a residue and the surface foam as it impedes visibility of sharp instruments. Always take great care with sharp instruments.
- Use nylon brushes, not green pads or wire brushes. Cleaning equipment should be cleaned and sterilized (or alternatively use disposables) and stored dry between use. Brushes should not be stored in disinfectant solutions.
- Use non-shedding and disposable cloths for cleaning and drying equipment.
- Fill basin with lukewarm water (water hotter than 35 degrees Celsius will coagulate proteins and prevent their removal)
- Fully immerse instruments and clean below the waterline to reduce aerosol formation. Avoid scrubbing under running water.
- Disassemble multi-part instruments and pay attention to crevice s and joints of instruments.
- Perform a final rinse under hot water to aid instrument drying
- Dry instruments to prevent carryover of contaminated wash water into the sterilizer.
- Visually inspect instruments for residual debris or blood after cleaning and repeat if necessary.