Dental models are three-dimensional reproductions of a patient’s teeth and gums, according to “Torres and Ehrlich Modern Dental Assisting.” Also called study casts, these models are valuable diagnostic tools for creating devices such as dentures or braces, or for making temporary crowns or mouth guards. Whatever the reason, making a permanent teeth model is easy to do, if you don’t mind having plaster in your mouth for a few minutes. You could do it yourself with a few pieces of equipment, or you could have your local dentist make a mold for you. It is painless and doesn’t take more than an hour to complete. With these models, the dentist can study a patient’s mouth at angles he or she cannot reach during a regular patient examination in the dental chair.
Things You’ll Need

Take the alginate impression of upper teeth
- Alginate material, powder measure, water measure, medium-sized rubber bowl, beavertail-shaped wide-blade spatula
- Room-temperature water
- Sterile impression trays
- Disinfectant spray
- Moist paper towel
- Plaster, flexible rubber mixing bowl, metal spatula, water measure
- Vibrator
- Bowl or tub
- Glass slab or tile
- Trimmer
- Gypsum, water, laboratory knife
- Dental lathe, pumice
Steps to Create a Dental Model
- Mix the alginate impression material in the medium-sized rubber bowl (measure the amount of powder and water according to the manufacturer’s instructions) until it appears smooth and creamy. Wipe the prepared alginate material into the impression tray for the bottom arch of the mouth, and seat the tray on the patient’s bottom teeth until the material has set. It is very important not to use anything else but alginate in the mouth.
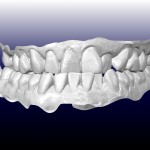
- Remove the bottom tray and then rinse, disinfect and wrap the impression in a slightly moist towel. Place the impression in a precaution bag, and take an impression of the upper arch of the mouth (picture 1).
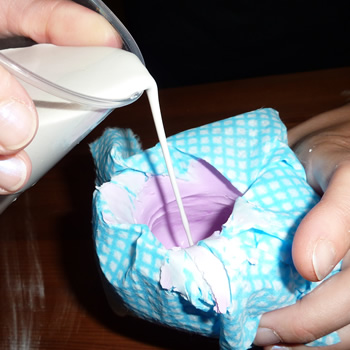
- Measure 45 milliliters of water in a flexible rubber bowl and add 100 grams of dental plaster in steady increments. Allow the powder to settle into the water for about 30 seconds, and mix until the plaster is smooth and creamy in about 20 seconds. If you are taking your own impression instead of your dentist, you can use regular plaster that can be bought from any crafts supply store.
- Place the bowl of plaster mix on the vibrator (set to low or medium speed). Lightly press and rotate the bowl on the vibrator for no longer than two minutes. This is to vibrate the bowl so that air bubbles won’t form and ruin the cast. You can also shake the impression tray while pouring in the plaster, so that the air bubbles can escape.
-

Pour the plaster into the alginate impression
Hold the first impression tray by the handle and place the edge of the handle’s base on the vibrator. Dip the metal spatula into the plaster mix, pick up a small increment and place it in the back teeth of the impression until the material flows and covers the entire arch. Place the remaining plaster mix in the bowl onto a glass slab or tile in the form of a mound about 2 inches by 2 inches by 1 inch thick. Then, gently invert the impression onto this mound (the base of the dental model), and repeat the process for the second impression tray.
- Wait 45 to 60 minutes to separate the impressions from the models. Soak the bases of the models in a bowl or tub of water for at least five minutes. Trim the bottom of the base, the back, the sides and the front of the model of the top teeth. Allow the teeth of the top- and bottom-arch models to touch as they naturally would in the mouth, and trim the back sides of these models so they are even. Move on to the model of the bottom teeth: Trim the bottom of the base of this model, as well as the sides and front. (When the bottom and top arches are touching each other, the models together should stand 3 inches tall.) Lastly, trim diagonal cuts on the back corners of the models, again with the teeth of the two arches touching as they naturally would in the mouth.
-
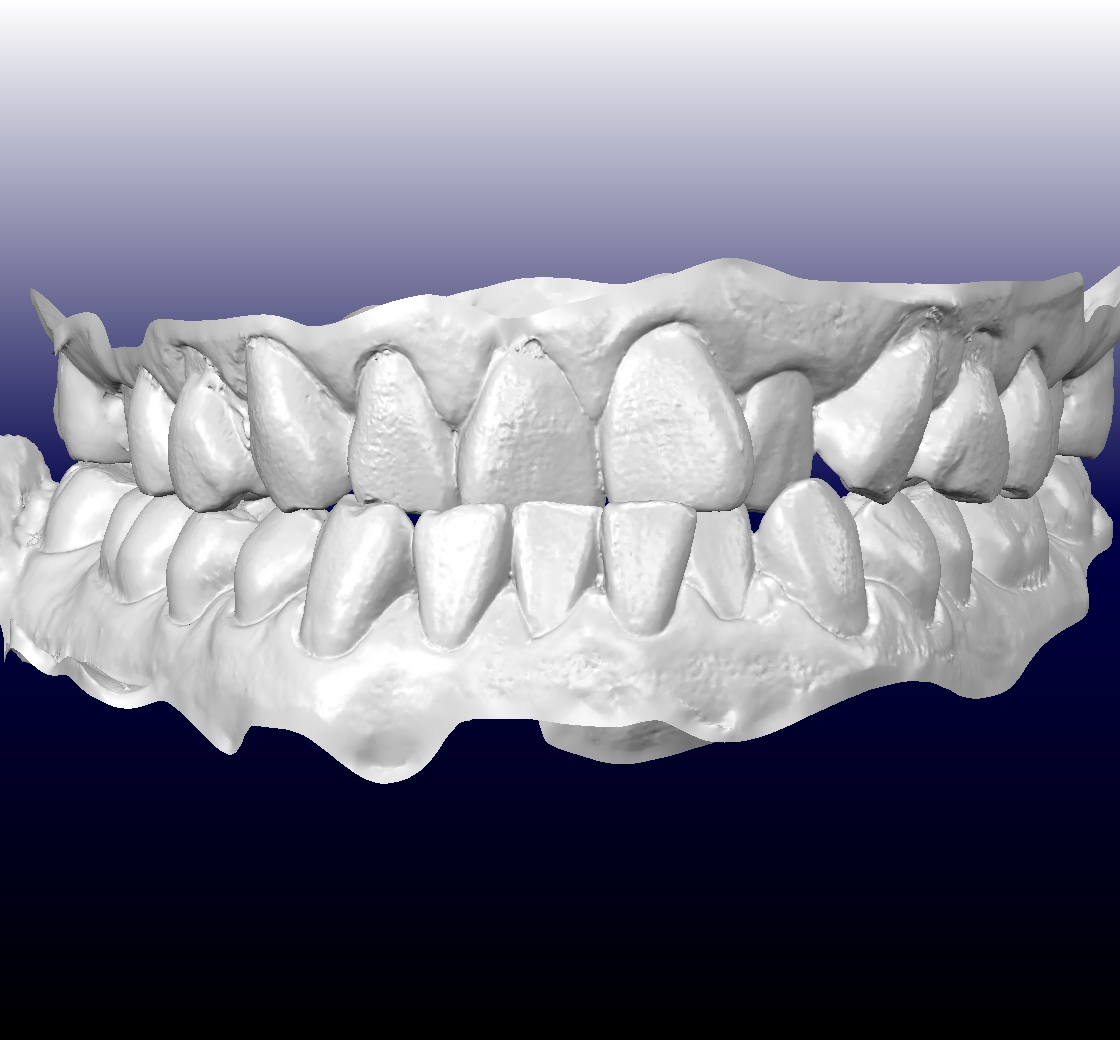
End product of the model
Mix gypsum and water together and fill any holes in the bases of the models. When it hardens, remove excess with a laboratory knife. Polish with a dental lathe and pumice.
Tips & Warnings
- A commercial rubber mold can be used to help pour the base of a dental model (the mound) onto the glass slab or tile.
- When placing the impression tray gently into the base, make sure the handle is parallel to the glass slab or tile to ensure the base will be uniformly thick.
- Keep the freshly taken impression of the patient’s teeth moist, or else it could dry out and become distorted.
- While trimming the bases of the dental models, be careful not to trim away the actual anatomy of the patient’s teeth and gums.