To begin with…
A full history and clinical examination, including bitewing radiography, should be carried out.
- • There should be no clinical or radiographic signs of pulpal involvement
- • The tooth should have sufficient sound tissue left to retain the crown
- • Patient co-operation should be such that the clinician should be confident that the crown can be fitted without endangering the patient’s airway
- • If the patient is at risk from bacterial endocarditis, the tooth should be managed with a conventional restoration
The appointment for fitting the crown

Young children can associate a dental crown to a crown a princess wears more easily
Preparation is everything! The child and parent should be briefed on the procedure. Children should be shown a crown, and allowed to handle a spare one if felt beneficial.
Young children sometimes respond to the idea of the crown being “a shiny helmetâ€, just like soldiers wear to protect their headsâ€, or “a precious, shiny, princess crown†or it being a “twinkle toothâ€.
It is important that the child knows that:
a) they will have to help, by biting the crown into place when asked to do so
b) the cement will taste a bit like Salt & Vinegar crisps
Instruments to have ready
Essential:
- Mirror
- Straight probe- to remove separators, if used, and to remove set cement following fitting
- Excavator – to remove crown if necessary, and also useful for cement removal
- Flat plastic – to load crown with cement
- Cotton wool rolls – to wipe away cement
Useful:
- Orthodontic biting stick – can be useful in seating crowns
- Band forming pliers – can be useful for adjusting crowns, particularly where the primary molar has lost length mesio-distally due to caries
- Gauze -Â to protect the airway and wipe off excess cement
or
- Elastoplast to secure the crown for airway protection
Assess the shape of the tooth and its contacts
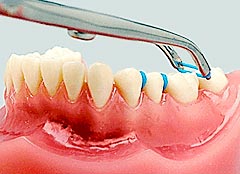
Orthodontic separators placed in between teeth to increase the space
Placing orthodontic separators through the mesial and distal contacts can be very useful when fitting crowns with the Hall technique, especially if the contact points are tight, or there has been loss of mesio-distal width of a tooth due to marginal ridge fracture. It does, though, mean the patient will have to make a second visit. Two lengths of dental floss should be threaded through the separator.
The separator should then be stretched taut, and “flossed†through the contact point briskly and firmly until the leading edge only is felt “popping through†the contact point.
If the separator is cut by sharp cavity margins, it may be found helpful to pull the separator “up, into & through†the contact area, approaching from the cervical margin.
The floss should then be removed, and the patient seen between 3-5 days later for removal of the separator.
If the separator appears to have fallen out, the inter-proximal area of the gingiva should be inspected to check that the separator hasn’t worked its way below the contact point. Separators are usually brightly coloured to facilitate this.
Another difficulty can be placing crowns on Ds where the distal marginal ridge has been lost, and the E has migrated mesially into
the cavity.
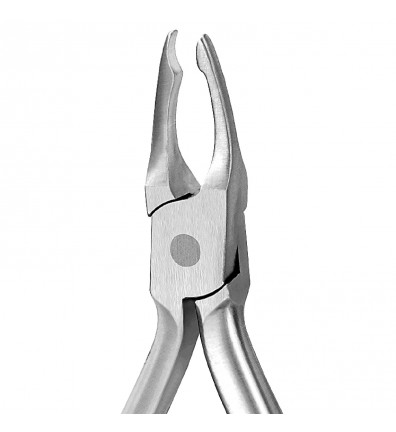
Band contouring plier
Here, band forming orthodontic pliers can be useful, both to increase the buccolingual width of the crown at the expense of the mesio-distal length (here using the pliers the “right†way around, that is with the curvature of the pliers following the curvature of the crown), and also, if necessary, to alter the distal margin of the crown from a convex to a concave shape, by gently squeezing the margin with the pliers the “wrong†way around.
 The procedure
1. Sit the child upright. A gauze swab square can be used to protect the airway by placing it between the tongue and the tooth where the crown is to be fitted. It should extend to the palate and round the back of the mouth in front of the fauces.
Alternatively, use a clean piece of Elastoplast tape to secure the crown. If you are not confident about being able to control the crown at all stages until it is cemented, then do not use the Hall Technique.
Airway protection using
a) a gauze square – Orientation of gauze. Positioned in mouth
b) Elastoplast – Elastoplast tape securing crown
2. You should aim to fit the smallest size of crown which will seat. Select one which covers all the cusps, and approaches
the contact points, with a slight feeling of “spring backâ€. Do not attempt to fully seat the crown through the contact points; they can be very difficult to remove for cementation!
3. Dry the crown, and fill with glass-ionomer luting cement, ensuring the crown is well filled, with no air inclusions.